Addresses
Last Updated: August 20, 2018
Use only for . . . addresses?
Code Example
Springfield,
80085,
USA
<address class="a-address">
    <span class="a-address__heading">The Simpsons,</span>
    742 Evergreen Terrace,<br>
    Springfield,<br>
    80085,<br>
    USA
</address>
External Resources
Avatars
Last Updated: December 4, 2018
Avatars are useful for quotations, profile pictures and account photos.
Accessibility Considerations
Same considerations as the image atom, with the primary concern being the inclusion of the alt attribute. Since the avatar atom should never be used merely as a decorative element, the alt description must be included, without exception.
Ensure that the alt attribute thoroughly describes the image; never simply place the file name here. In most cases the avatar will contain a portrait, so a good alt description would be "John Q. Public, MD, Cardiothoracic Surgeon," not "Dr. Public" or "public-john.jpg."
Use
Primarily used in the content banner molecule.
Recommended 👍

Not Recommended 👎
Code Examples (with variations)

Super
XLarge
Large
Medium
Small
XSmall
<div class="a-avatar  a-avatar--super">
  <img class="a-avatar__img" src="https://source.unsplash.com/random/200x200">
  <p class="u-text-align--center u-color-black"><strong>Super</strong></p>
</div>
<div class="a-avatar  a-avatar--xlarge">
  <img class="a-avatar__img" src="https://source.unsplash.com/random/200x200">
  <p class="u-text-align--center u-color-black"><strong>XLarge</strong></p>
</div>
<div class="a-avatar  a-avatar--large">
  <img class="a-avatar__img" src="https://source.unsplash.com/random/200x200">
  <p class="u-text-align--center u-color-black"><strong>Large</strong></p>
</div>
<div class="a-avatar">
  <img class="a-avatar__img" src="https://source.unsplash.com/random/200x200">
  <p class="u-text-align--center u-color-black"><strong>Medium</strong></p>
</div>
<div class="a-avatar  a-avatar--small">
  <img class="a-avatar__img" src="https://source.unsplash.com/random/200x200">
  <p class="u-text-align--center u-color-black u-xsmall"><strong>Small</strong></p>
</div>
<div class="a-avatar  a-avatar--xsmall">
  <img class="a-avatar__img" src="https://source.unsplash.com/random/200x200">
  <p class="u-text-align--center u-color-black u-xsmall"><strong>XSmall</strong></p>
</div>
Initials
If no picture is available, use data-text to add initials.
<div class="a-avatar" data-text="MR"></div>
Corners
If no picture is available, use data-text to add initials.
<div class="a-avatar  a-avatar--square">
  <img class="a-avatar__img" src="https://source.unsplash.com/random/200x200">
</div>
<div class="a-avatar  a-avatar--radius">
  <img class="a-avatar__img" src="https://source.unsplash.com/random/200x200">
</div>
<div class="a-avatar  a-avatar--round">
  <img class="a-avatar__img" src="https://source.unsplash.com/random/200x200">
</div>
External Resources
Badges
Last Updated: August 20, 2018
Badges are useful when you want to show additional info like status, tags, or categories.
Typically badges will use a <span> element.
Code Example
<span class="a-badge">Badge</span>
<span class="a-badge a-badge--brand">Brand</span>
<span class="a-badge a-badge--square">Square</span>
<span class="a-badge a-badge--round">Round</span>
Blockquotes
Last Updated: August 21, 2018
A blockquote is a callout section that is quoted from another source, or highlight quoted from within the article itself.
Use
When used as a callout to an in-page quotation, <cite> is not required (but can be used if someone other than the article's author is being quoted). For all other quotes, <cite> must be used and should include as much of the following as possible:
- Author's name
- Title of work
- Url containing original quote, or author's work (place in the 'cite' attribute within the
<blockquote>tag and in the 'href' attribute in the<a>tag sorrounding the source text in the<cite>tag) - Location of the quotation within the cited work
Code Examples
Children need encouragement. If a kid gets an answer right, tell him it was a lucky guess. That way he develops a good, lucky feeling.
<blockquote class="a-blockquote" cite="https://www.deepthoughtsbyjackhandey.com/">
    <div class="a-blockquote__body">
        Children need encouragement. If a kid gets an answer right, tell him it was a lucky guess. That way he develops a good, lucky feeling.
    </div>
    <footer class="a-blockquote__footer">
        <cite class="a-cite">Jack Handey, <a href="https://www.deepthoughtsbyjackhandey.com/" target="_blank"><em>Deep Thoughts</em></a></cite>
    </footer>
</blockquote>
A lot of people are afraid of heights. Not me. I'm afraid of widths.
<blockquote class="a-blockquote  a-blockquote--emphasis">
    <div class="a-blockquote__body">
        <p>A lot of people are afraid of heights. Not me. I'm afraid of widths.</p>
    </div>
    <footer class="a-blockquote__footer">
        <cite class="a-cite">Steven Wright</cite>
    </footer>
</blockquote>
External Resources
Buttons
Last Updated: August 21, 2018
Buttons add visual interest and draw the user's eye, when used appropriately.
Use
Button styles can be applied to any element. Typically you'll want
to use either a <button> or an <a> element:
If your button is actually a link to another page, please use the
<a> element, while if your button performs an action, such as
submitting a form or triggering some javascript event, then use a
<button> element.
Recommended 👍

Not Recommended 👎
Code Examples & Variations
<button class="a-button">Button</button>
Button Colors
<a class="a-button a-button--brand" href="#">Brand</a>
<a class="a-button a-button--brand-fill" href="#">Brand-Fill</a>
Button Sizes
<a class="a-button a-button--xsmall" href="#">xsmall</a>
<a class="a-button a-button--small" href="#">small</a>
<a class="a-button a-button--medium" href="#">medium</a>
<a class="a-button a-button--large" href="#">large</a>
<a class="a-button a-button--xlarge" href="#">xlarge</a>
<a class="a-button a-button--super" href="#">super</a>
Button Corners
<a class="a-button a-button--square" href="#">square</a>
<a class="a-button a-button--round" href="#">round</a>
Full-Width Buttons
<a class="a-button a-button--expand" href="#">expand</a>
Disabled Buttons
<a class="a-button a-button--disabled" href="#">disabled</a>
Figures (Move to Molecules?)
Last Updated: August 21, 2018
Figures are self-contained content, referenced in the main body of a page, but can be placed anywhere on that page without affecting the flow of the page. Typically includes an <img> and a <figcaption>.
Accessibility Considerations
When using <img>, with the src as a raster image (.jpg, .png, .gif), the same considerations as the image atom apply, with the primary concern being the inclusion of the alt attribute. Since the figure molecule should never be used merely as a decorative element, the alt description must be included, without exception.
Ensure that the alt attribute thoroughly describes the image; never simply place the file name here. Also, try to make the alt description distinct from the <figcaption> text. For example: "white goat, stands on the back of brown cow," not "cow-goat.jpg."
Use
A figure includes illustrative content used as additional information to strengthen the main text. Its value remains, regardless of where it's placed with the page; however, it is typically placed immediately below its first reference within the main text.
The figure body commonly contains a photo (.jpg, .png, .gif), vector graphic, infographic (svg), or data visualization (svg).
Note: notice the img elements have a data-original attribute instead of a src. This is for lazy loading. These images will not load until they are in the viewport. This saves bandwidth for us and the user. If you do not wish to lazy load images, use src.
<figure class="a-figure">
    <img class="a-figure__image" data-original="http://placehold.it/600x300" alt="placeholder image">
    <figcaption class="a-figure__caption">This is a caption</figcaption>
</figure>
Figure Alignment
<figure class="a-figure  a-figure--left">
    <img class="a-figure__image" data-original="http://placehold.it/200x200" alt="placeholder image">
    <figcaption class="a-figure__caption">This is a left-aligned figure</figcaption>
</figure>
<figure class="a-figure  a-figure--right">
    <img class="a-figure__image" data-original="http://placehold.it/200x200" alt="placeholder image">
    <figcaption class="a-figure__caption">This is a right-aligned figure</figcaption>
</figure>
Sizing
On larger screens, figures have a max width of 300px. In order to increase or decrease the size of figure, use one of these modifiers: a-figure--small, a-figure--large, a-figure--xlarge.
External Resources
Headings
Last Updated: August 21, 2018
Headings (<h1> - <h6>) are used for content structure, not presesentation.
Accessibility Considerations
To avoid confusing users who navigate with a screen reader, avoid skipping heading levels.
Use
Headings define the hierarchy of page content. They provide consistent, reliable points of reference to a user while scanning a page's content. They are not for changing the visual design of text. To modify the look and feel of text, please use the appropriate utility classes (colors, alignment, line height, size, etc.).
Some considerations to follow:
- Avoid skipping heading levels (i.e.: h1, h2, h3, h6)
- Only use
<h1>once on every page (unless you're using Hologram to build a pattern library :0) - Use our built-in utility classes when wanting to alter text appearance
Code Example
h1 40px
h2 28px
h3 22px
h4 19px
h5 17px
h6 16px
<h1 class="a-h1">h1 40px</h1>
<h2 class="a-h2">h2 28px</h2>
<h3 class="a-h3">h3 22px</h3>
<h4 class="a-h4">h4 19px</h4>
<h5 class="a-h5">h5 17px</h5>
<h6 class="a-h6">h6 16px</h6>
External Resources
Horizontal Rules
Last Updated: August 21, 2018
Horizontal rules are used to separate content or define a change in an HTML page.
Code Example
<hr class="a-hr">
<hr class="a-hr a-hr--block">
<hr class="a-hr a-hr--type">
Icons
Last Updated: December 4, 2018
Icons are served via an SVG sprite system. For a full list of available icons, check out the Icon Library.
Use
Icons can provide a simple way to draw a user's eye to a specific element; but only if they're used sparingly and are accompanied by explanatory text. On its own, an icon's meaning is open to broad interpretation, with few exceptions. While icons can add visual interest to an element they, generally speaking, add little benefit to the usability of said element.
Code Examples
Sizes
Size modifiers change the size of icons.
<svg class="a-icon  a-icon--xsmall">
    <use xlink:href="../images/svg/icons.svg#search-icon"></use>
</svg>
<svg class="a-icon  a-icon--small">
    <use xlink:href="../images/svg/icons.svg#search-icon"></use>
</svg>
<svg class="a-icon  a-icon--medium">
    <use xlink:href="../images/svg/icons.svg#search-icon"></use>
</svg>
<svg class="a-icon  a-icon--large">
    <use xlink:href="../images/svg/icons.svg#search-icon"></use>
</svg>
<svg class="a-icon  a-icon--xlarge">
    <use xlink:href="../images/svg/icons.svg#search-icon"></use>
</svg>
<svg class="a-icon  a-icon--super">
    <use xlink:href="../images/svg/icons.svg#search-icon"></use>
</svg>
Social Media
Social media modifiers can be used to fill icons with each network's brand color.
<svg class="a-icon  a-icon--facebook">
    <use xlink:href="../images/svg/icons.svg#facebook"></use>
</svg>
<svg class="a-icon  a-icon--twitter">
    <use xlink:href="../images/svg/icons.svg#twitter"></use>
</svg>
Images
Last Updated: August 22, 2018
No classes necessary for images. They will behave responsively by default.
Accessibility Considerations
Take special consideration to the alt attribute. If the image is purely decorative, inconsequential to the surrounding content, use the alt attribute, but leave it blank (alt=""). Otherwise, thoroughly describe the image so that users with screen readers or other assistive devices benefit from the full message. The file name never belongs in the alt description. For example, alt="Four kids playing basketball outside on a sunny day", not alt="basketball" or alt="DSC_0007865.jpg".
Use
Note: notice the img elements have a data-original attribute instead of a src. This is for lazy loading. These images will not load until they are in the viewport. This saves bandwidth for us and the user. If you do not wish to lazy load images, use src.
Code Example
<img alt="placeholder" data-original="https://placehold.it/200x200"/>
External Resources
Inputs
Last Updated: December 4, 2018
Inputs are tricky because some are atoms and some are molecules. Keep an eye on the namespacing. For other form element which combine two or more atoms, see forms in molecules.
Use
Accessiblity Considerations
Placeholder text should not be used to give instructions to a user on how to use a form field. Most screen readers do not read the placeholder text. The <label> tag should be used for this text. In some cases, the "u-visuallyhidden" visibility class can be used to hide the label from all users, except those using screen readers.
Code Examples
Text Inputs
<label for="text-input">Standard Text Input</label>
<input id="text-input" class="a-field" type="text">
<label for="select-box">Choose one of the following:</label>
<select id="select-box" class="a-field">
    <option>Choose me...</option>
    <option>No, choose me</option>
    <option>No, choose MEEEE!!!</option>
</select>
<label for="text-area">Use this type of field for multi-line input</label>
<textarea id="text-area" class="a-field"></textarea>
Colors
<input class="a-field a-field--success" type="text" placeholder=".a-field--success">
<input class="a-field a-field--error" type="text" placeholder=".a-field--error">
<input class="a-field" disabled type="text" placeholder="disabled">
Icons
Technically, input elements with icons are molecules, not atoms. Therefore, they are prefixed with m- instead of a-.
<div class="m-field  m-field--icon-left">
    <svg class="a-icon">
        <use xlink:href="#search-icon"></use>
    </svg>
    <input class="a-field" type="text">
</div>
Sizes
To change the size of input elements we will use utility classes.
<input class="a-field u-xsmall" type="text" placeholder=".u-xsmall">
<input class="a-field u-small" type="text" placeholder=".u-small">
<input class="a-field u-medium" type="text" placeholder=".u-medium">
<input class="a-field u-large" type="text" placeholder=".u-large">
<input class="a-field u-xlarge" type="text" placeholder=".u-xlarge">
<input class="a-field u-super" type="text" placeholder=".u-super">
Checkboxes and Radios
Place your checkboxes and radios within labels and append the .a-field--choice modifier class.
<label class="a-field  a-field--choice">
    <input type="checkbox"> Tick the box
</label>
<label class="a-field  a-field--choice">
    <input name="radios" type="radio" checked> Yes, this is a standard radio
</label>
<label class="a-field  a-field--choice">
    <input id="no-radio" name="radios" type="radio"> No, the is a regular radio
</label>
Checkbox Button Grid
An alternate styling, currently only in use on the Find A Location page. For more grid options see the grids section in layouts.
<div class="l-grid">
    <div class="l-grid__item 1/3">
        <label class="m-dropdown-services a-button  a-button--brand a-button--small a-button--expand u-space-bottom--medium" for="option-one">One</label>
        <input class="m-dropdown-services" id="option-one" type="checkbox" name="filter" value="option-one">
    </div>
    <div class="l-grid__item 1/3">
        <label class="m-dropdown-services a-button  a-button--brand a-button--small a-button--expand u-space-bottom--medium" for="option-two">Two</label>
        <input class="m-dropdown-services" id="option-two" type="checkbox" name="filter" value="option-two">
    </div>
    <div class="l-grid__item 1/3">
        <label class="m-dropdown-services a-button  a-button--brand a-button--small a-button--expand u-space-bottom--medium" for="option-c">C</label>
        <input class="m-dropdown-services" id="option-c" type="checkbox" name="filter" value="option-c">
    </div>
</div>
External Resources
Links
Last Updated: August 22, 2018
Our standard, in-text link is red, slightly-bolded with a solid underline. Used for in-page anchor links or links to other pages, specifying the target window.
Accessibility Considerations
Links that have target="_blank" should provide an indication that a new window will open (i.e. <a href="http://google.com" target="_blank">Google (opens an external page in a new window/tab)</a>).
When linking to a non-html doctument, indicate what type of file the link will open.
Use
We use target="_blank" for all links to webpages outside of our domains (healthcare.utah.edu, medicine.utah.edu, etc.).
For internal links, avoid using target="_blank".
Main body text links should not be restyled in any way (even using utility classes).
Code Example
<a class="a-link">hyper-link</a>
External Resources
Lists
Last Updated: August 23, 2018
Lists group related items into an easy to scan block for better content legibility. Lists can be nested as needed for lists within lists within lists within . . .
Use
Unordered lists (<ul>) contain items whose order is unimportant to the meaning of the content. The item order could be changed without changing the meaning.
Ordered lists (<ol>) contain items whose order is essential to the meaning and/or flow of the content.
Code Examples
Unordered
- Lorem ipsum dolor sit amet
- Consectetur adipiscing elit
- Nulla volutpat aliquam velit
- Phasellus iaculis neque
- Purus sodales ultricies
- Vestibulum laoreet porttitor sem
- Ac tristique libero volutpat at
- Faucibus porta lacus fringilla vel
<ul class="a-list">
    <li class="a-list__item">Lorem ipsum dolor sit amet</li>
    <li class="a-list__item">Consectetur adipiscing elit</li>
    <li class="a-list__item">Nulla volutpat aliquam velit
        <ul class="a-list">
            <li class="a-list__item">Phasellus iaculis neque</li>
            <li class="a-list__item">Purus sodales ultricies</li>
            <li class="a-list__item">Vestibulum laoreet porttitor sem</li>
            <li class="a-list__item">Ac tristique libero volutpat at</li>
        </ul>
    </li>
    <li class="a-list__item">Faucibus porta lacus fringilla vel</li>
</ul>
Ordered
- Lorem ipsum dolor sit amet
- Consectetur adipiscing elit
- Nulla volutpat aliquam velit
- Phasellus iaculis neque
- Purus sodales ultricies
- Vestibulum laoreet porttitor sem
- Ac tristique libero volutpat at
- Faucibus porta lacus fringilla vel
<ol class="a-list">
    <li class="a-list__item">Lorem ipsum dolor sit amet</li>
    <li class="a-list__item">Consectetur adipiscing elit</li>
    <li class="a-list__item">Nulla volutpat aliquam velit
        <ol class="a-list">
            <li class="a-list__item">Phasellus iaculis neque</li>
            <li class="a-list__item">Purus sodales ultricies</li>
            <li class="a-list__item">Vestibulum laoreet porttitor sem</li>
            <li class="a-list__item">Ac tristique libero volutpat at</li>
        </ol>
    </li>
    <li class="a-list__item">Faucibus porta lacus fringilla vel</li>
</ol>
Variations
Divider
Add lines between list items. Used primarily in navigational elements, such as a related content sidebar.
- Lorem ipsum dolor sit amet
- Consectetur adipiscing elit
- Faucibus porta lacus fringilla vel
<ul class="a-list  a-list--divider">
    <li class="a-list__item">Lorem ipsum dolor sit amet</li>
    <li class="a-list__item">Consectetur adipiscing elit</li>
    <li class="a-list__item">Faucibus porta lacus fringilla vel</li>
</ul>
Un-styled
Applying .a-list--unstyled to a list will remove the bullet points.
You can remove bullet points on individual items by adding the .a-list__item--unstyled modifier.
- I'm an unstyled list
- Consectetur adipiscing elit
- Nulla volutpat aliquam velit
- Phasellus iaculis neque
- Purus sodales ultricies
- I'm an unstyled item
- Ac tristique libero volutpat at
- Faucibus porta lacus fringilla vel
<ul class="a-list  a-list--unstyled">
    <li class="a-list__item"><strong>I'm an unstyled list</strong></li>
    <li class="a-list__item">Consectetur adipiscing elit</li>
    <li class="a-list__item">Nulla volutpat aliquam velit
        <ul class="a-list"> <!-- Has bullet points-->
            <li class="a-list__item">Phasellus iaculis neque</li>
            <li class="a-list__item">Purus sodales ultricies</li>
            <li class="a-list__item  a-list__item--unstyled"><strong>I'm an unstyled item</strong></li>
            <li class="a-list__item">Ac tristique libero volutpat at</li>
        </ul>
    </li>
    <li class="a-list__item">Faucibus porta lacus fringilla vel</li>
</ul>
Inline
To make your list items flow left to right apply the .a-list--inline modifier. Use with small lists with low-word count iteams.
- Lorem
- ipsum
- dolor
<ul class="a-list  a-list--inline">
    <li class="a-list__item">Lorem</li>
    <li class="a-list__item">ipsum</li>
    <li class="a-list__item">dolor</li>
</ul>
External Resources
- MDN Entry for the Unordered List Element
- MDN Entry for the Ordered List Element
- MDN Entry for the List Item List Element
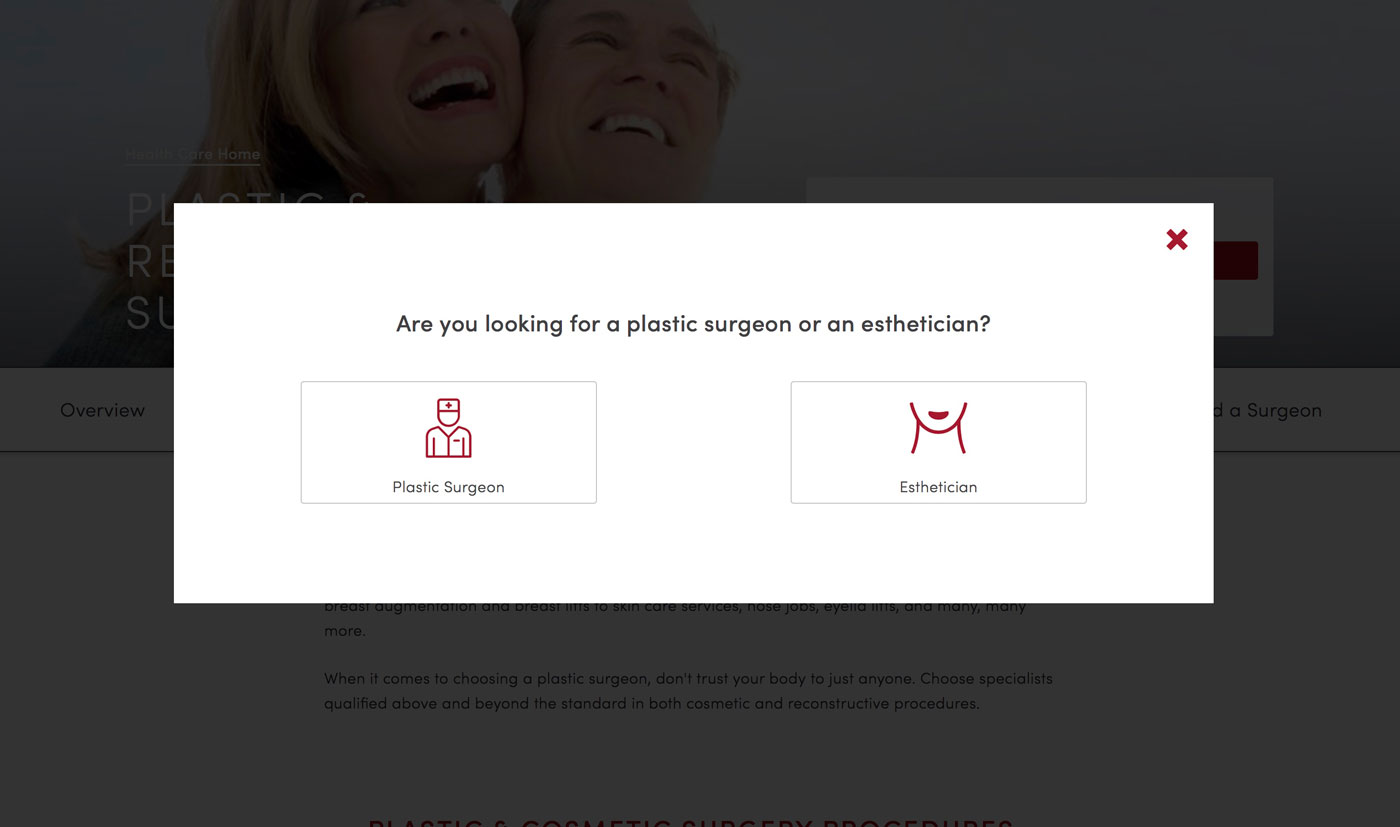
Overlays
Last Updated: August 23, 2018
Overlays are used to blackout the background context of the page.
Use
Overlays are only used on our sites in conjunction with the modal molecule. Because overlays, especially full-page ones, disrupt a user's flow use judiciously. Use when the user's attention on the modal is essential to him/her accomplishing his/her goal.
To contain an overlay within an element set the parent element CSS to position: relative;
Code Examples
<div class="u-bg-black  u-padding--medium" style="position:relative;">
    <div class="a-overlay"></div>
</div>
Dismissable
Dismissable overlays change the mouse cursor to a hand on mouseover.
<div class="u-bg-black  u-padding--medium" style="position:relative;">
    <div class="a-overlay  a-overlay--dismissable"></div>
</div>
Transparent
Overlays don't necessarily need to be visible, they can appear transparent to provide functionality but no visual cues. If so use the a-overlay--transparent modifier.
<div class="u-bg-black  u-padding--medium" style="position:relative;">
    <div class="a-overlay  a-overlay--transparent"></div>
</div>
White
The a-overlay--white class will make the overlay a transparent white color.
<div class="u-bg-black  u-padding--medium" style="position:relative;">
    <div class="a-overlay  a-overlay--white"></div>
</div>
Full Page
You can make overlays cover the entire page by adding the a-overlay--fullpage modifier. The overlay will remain in a fixed position behind the content you want to promote.
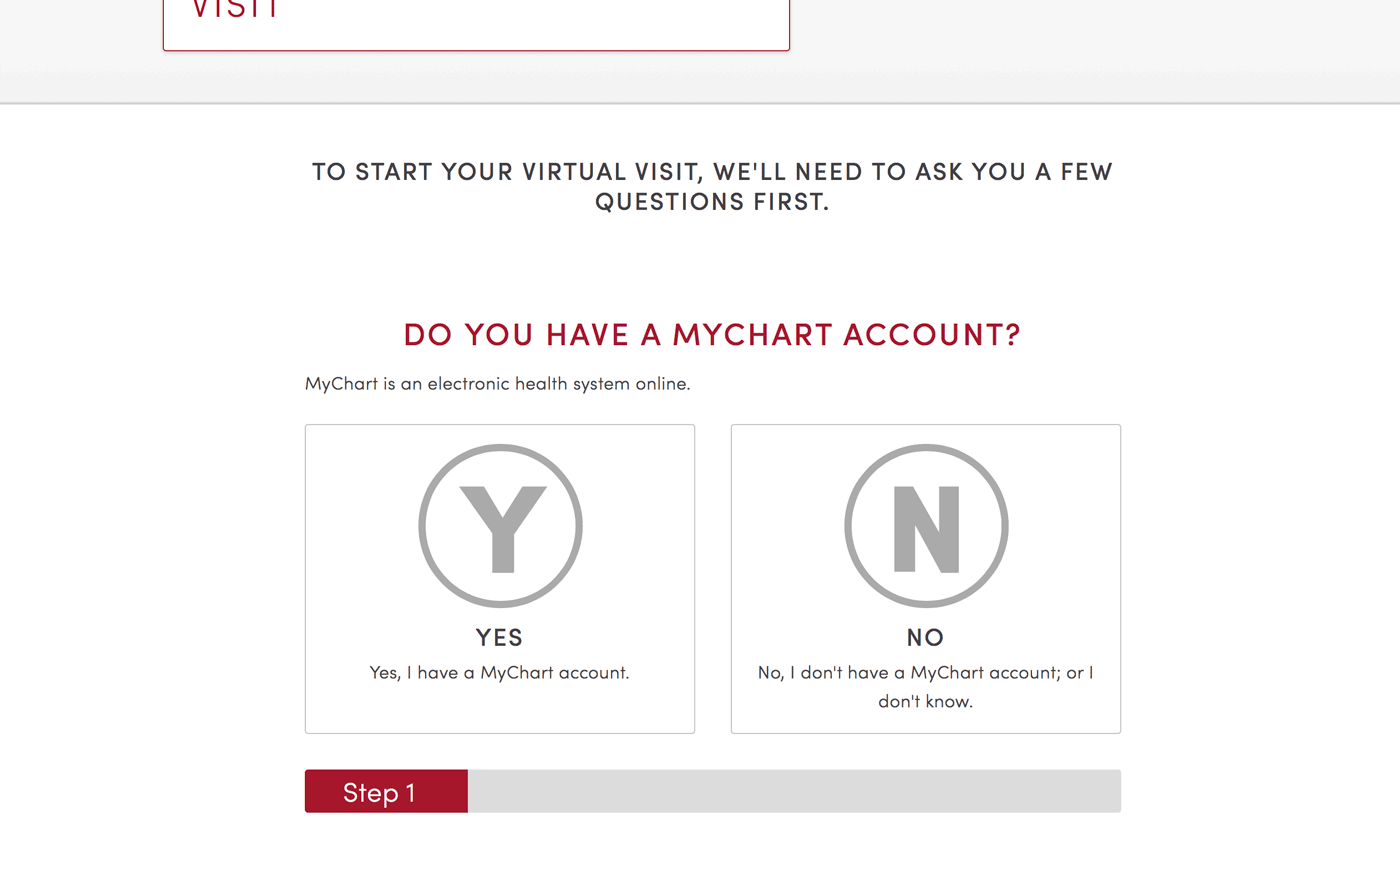
Progress
Last Updated: August 23, 2018
Progress bars are used to help set user expectations on how long a certain task will take and where he/she is in the process.
Use
These are primary used in one-thing-at-a-time forms, where the form is broken up into individual chunks to improve the overall completion rate of the form. Should not be used as an estimate of how much the user has remaining, but rather as an exact number.
Use the style="width:00%" attribute, using width to set the "percentage" remaining. The text overlaid on the progress bar is placed within the same <div> that has said style attribute.
Code Examples
<div class="a-progress u-space-bottom--small">
    <div class="a-progress__bar" style="width:15%;"></div>
</div>
Rounded
<div class="a-progress  a-progress--rounded u-space-bottom--small">
    <div class="a-progress__bar" style="width:15%;"></div>
</div>
Colors
<div class="a-progress u-space-bottom--small">
    <div class="a-progress__bar  a-progress__bar--brand" style="width:15%;"></div>
</div>
Sizes
<div class="a-progress  u-xsmall">
    <div class="a-progress__bar" style="width:5%;">5%</div>
</div><br>
<div class="a-progress  u-small">
    <div class="a-progress__bar" style="width:15%;">15%</div>
</div><br>
<div class="a-progress  u-medium">
    <div class="a-progress__bar" style="width:20%;">20%</div>
</div><br>
<div class="a-progress  u-large">
    <div class="a-progress__bar" style="width:25%;">25%</div>
</div><br>
<div class="a-progress  u-xlarge">
    <div class="a-progress__bar" style="width:45%;">45%</div>
</div><br>
<div class="a-progress  u-super">
    <div class="a-progress__bar" style="width:65%;">65%</div>
</div>
Social Share Kit
Last Updated: August 23, 2018
Social Share Kit is a library of decent and good looking CSS/JavaScript social sharing tools like social network icons, share buttons, share count, floating/sticky button bar and popups.
Use & Code Examples
In order for the buttons to work, these CSS and JS files must be included on the page.
<link href="https://cdnjs.cloudflare.com/ajax/libs/social-share-kit/1.0.13/css/social-share-kit.css" media="all" rel="stylesheet" type="text/css" />
<script type="text/javascript" src="https://cdnjs.cloudflare.com/ajax/libs/social-share-kit/1.0.13/js/social-share-kit.min.js"></script>
<script type="text/javascript">
SocialShareKit.init();
</script>
Then the following code can be used to have social buttons.
<div class="ssk-group ssk-xs a-ssk">
    <a href="" class="ssk ssk-facebook"></a>
    <a href="" class="ssk ssk-twitter"></a>
    <a href="" class="ssk ssk-google-plus"></a>
    <a href="" class="ssk ssk-pinterest"></a>
</div>
Alignment
Button alignments can be changed with the following modifiers: a-ssk--center, a-ssk--left, a-ssk--right.
<div class="ssk-group  ssk-xs  a-ssk  a-ssk--center">
    <a href="" class="ssk ssk-facebook"></a>
    <a href="" class="ssk ssk-twitter"></a>
</div>
<div class="ssk-group  ssk-xs  a-ssk  a-ssk--right">
    <a href="" class="ssk ssk-facebook"></a>
    <a href="" class="ssk ssk-twitter"></a>
</div>
External Resources
- For more information, visit the Social Share Kit site.
Tables
Last Updated: August 23, 2018
Tables should never be used for layout, only for displaying tabular data.
Accessibility Considerations
Use the <caption> tag (nested after the opening <table> tag, but before <tbody>) to announce the table's purpose to screen reader users so they can more easily decide whether to skip the entire table or not. In most cases, it's acceptable to use the visibility utility classes u-visually and hidden u-focusable to hide the caption from all user agents except screen readers.
Use
Use the <thead> section (which precedes <tbody>) to define each columns header (which should be enclosed in <th> tags, not <td>).
Code Examples and Variations
| First name | Last name | Username |
|---|---|---|
| Jim | Kirk | @captaink |
| Mr. | Spock | @science101 |
| Nyota | Uhura | @comms |
<table class="a-table">
    <caption class="a-table__caption">Basic table</caption>
    <thead class="a-table__head">
        <tr class="a-table__row a-table__row--heading">
            <th class="a-table__cell">First name</th>
            <th class="a-table__cell">Last name</th>
            <th class="a-table__cell">Username</th>
        </tr>
    </thead>
    <tbody class="a-table__body">
        <tr class="a-table__row">
            <td class="a-table__cell">Jim</td>
            <td class="a-table__cell">Kirk</td>
            <td class="a-table__cell">@captaink</td>
        </tr>
        <tr class="a-table__row">
            <td class="a-table__cell">Mr.</td>
            <td class="a-table__cell">Spock</td>
            <td class="a-table__cell">@science101</td>
        </tr>
        <tr class="a-table__row">
            <td class="a-table__cell">Nyota</td>
            <td class="a-table__cell">Uhura</td>
            <td class="a-table__cell">@comms</td>
        </tr>
    </tbody>
</table>
Striped
| First name | Last name | Username |
|---|---|---|
| Jim | Kirk | @captaink |
| Mr. | Spock | @science101 |
| Nyota | Uhura | @comms |
<table class="a-table a-table--striped">
    <caption class="a-table__caption">Striped rows</caption>
    <thead class="a-table__head">
        <tr class="a-table__row a-table__row--heading">
            <th class="a-table__cell">First name</th>
            <th class="a-table__cell">Last name</th>
            <th class="a-table__cell">Username</th>
        </tr>
    </thead>
    <tbody class="a-table__body">
        <tr class="a-table__row">
            <td class="a-table__cell">Jim</td>
            <td class="a-table__cell">Kirk</td>
            <td class="a-table__cell">@captaink</td>
        </tr>
        <tr class="a-table__row">
            <td class="a-table__cell">Mr.</td>
            <td class="a-table__cell">Spock</td>
            <td class="a-table__cell">@science101</td>
        </tr>
        <tr class="a-table__row">
            <td class="a-table__cell">Nyota</td>
            <td class="a-table__cell">Uhura</td>
            <td class="a-table__cell">@comms</td>
        </tr>
    </tbody>
</table>
Condensed
| First name | Last name | Username |
|---|---|---|
| Jim | Kirk | @captaink |
| Mr. | Spock | @science101 |
| Nyota | Uhura | @comms |
<table class="a-table a-table--condensed">
    <caption class="a-table__caption">Small table and text</caption>
    <thead class="a-table__head">
        <tr class="a-table__row a-table__row--heading">
            <th class="a-table__cell">First name</th>
            <th class="a-table__cell">Last name</th>
            <th class="a-table__cell">Username</th>
        </tr>
    </thead>
    <tbody class="a-table__body">
        <tr class="a-table__row">
            <td class="a-table__cell">Jim</td>
            <td class="a-table__cell">Kirk</td>
            <td class="a-table__cell">@captaink</td>
        </tr>
        <tr class="a-table__row">
            <td class="a-table__cell">Mr.</td>
            <td class="a-table__cell">Spock</td>
            <td class="a-table__cell">@science101</td>
        </tr>
        <tr class="a-table__row">
            <td class="a-table__cell">Nyota</td>
            <td class="a-table__cell">Uhura</td>
            <td class="a-table__cell">@comms</td>
        </tr>
    </tbody>
</table>
External Resources
- MDN Entry for the Table Element
- MDN Entry for the Table Head Element
- MDN Entry for the Table Body Element
- MDN Entry for the Table Foot Element
- MDN Entry for the Table Row Element
- MDN Entry for the Table Data Cell Element
- MDN Entry for the Table Heading Element
- MDN Entry for the Table Caption Element
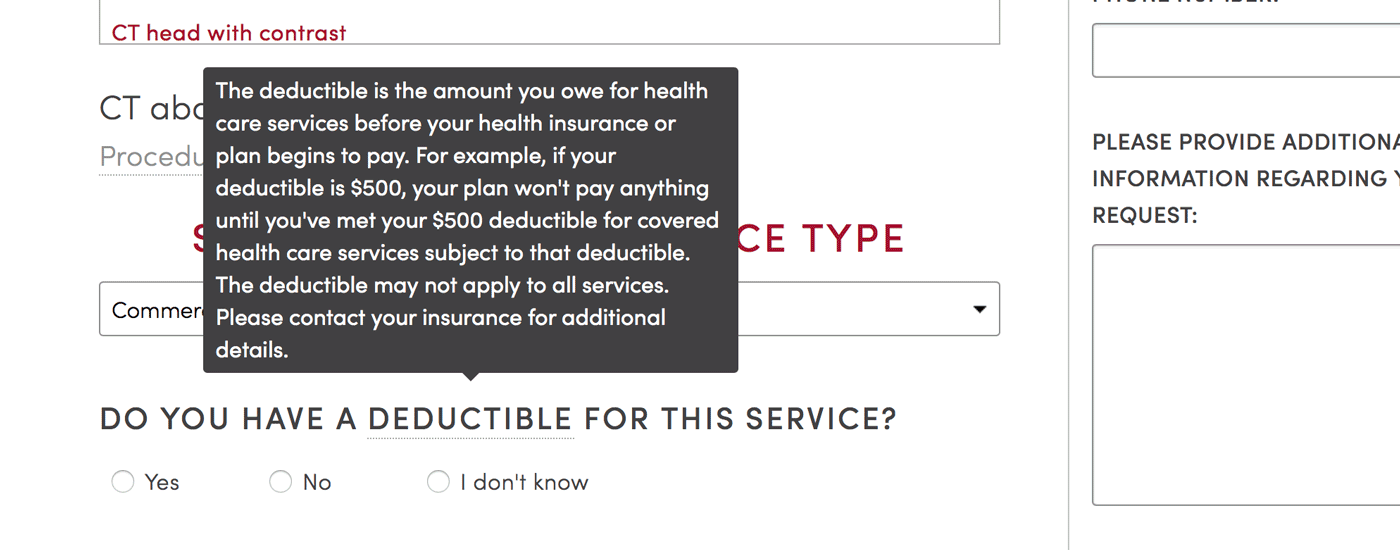
Tooltips
Last Updated: August 23, 2018
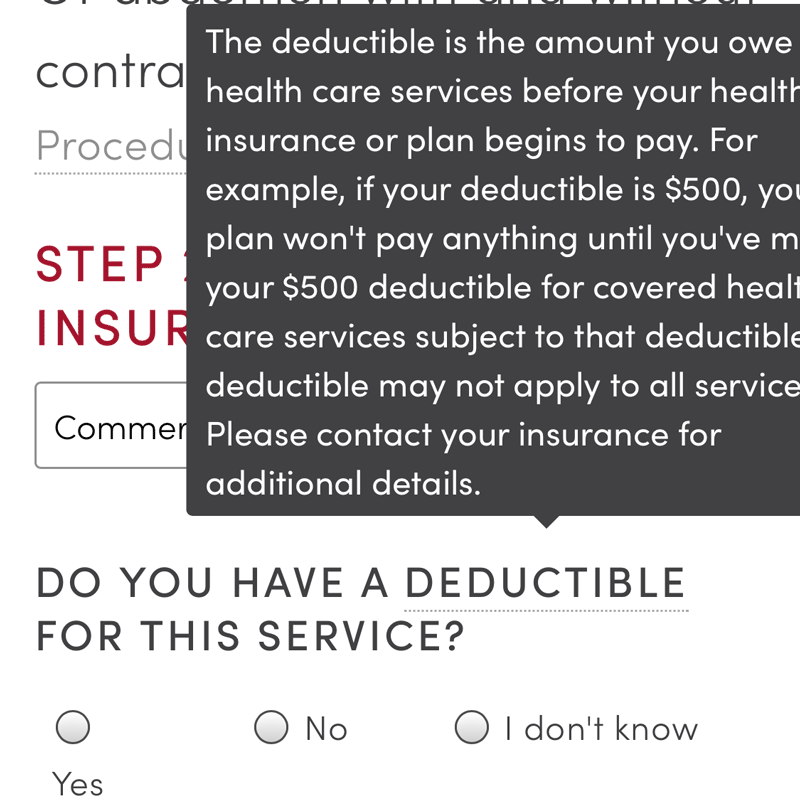
Provides supplementary information without removing the user from the flow of the main content.
Use
Tooltips are activated on hover in desktop browsers and on click/tap on mobile.
A tooltip's content is entered in the aria-label attribute within the associated <span>.
Code Examples
Hint
The hint modifier gives text an dotted underline and question mark cursor on hover.
<span class="a-tooltip a-tooltip--top a-tooltip--hint" aria-label="This is a tooltip">Hover over me...</span>
Position
Top
<span class="a-tooltip a-tooltip--top" aria-label="This is a tooltip">Hover over me...</span>
Right
<span class="a-tooltip a-tooltip--right a-tooltip--hint" aria-label="This is a tooltip">Hover over me...</span>
Bottom
<span class="a-tooltip a-tooltip--bottom" aria-label="This is a tooltip">Hover over me...</span>
Left
<span class="a-tooltip a-tooltip--left" aria-label="This is a tooltip">Hover over me...</span>
Size
Small
<span class="a-tooltip a-tooltip--top a-tooltip--small" aria-label="Hi.">I'm a small tooltip</span>
Medium
<span class="a-tooltip a-tooltip--top a-tooltip--medium" aria-label="Now that's a super big text we have over here right? Lorem ipsum dolor sit I'm done.">I'm a medium tooltip</span>
Large
<span class="a-tooltip a-tooltip--top a-tooltip--large" aria-label="What about something really big? This may surpass your window dimensions. Imagine you're on that boring class with that boring teacher and you didn't slept so well last night. Suddenly you're sleeping in class. Can you believe it?!">I'm a large tooltip</span>
Xlarge
<span class="a-tooltip a-tooltip--top a-tooltip--xlarge" aria-label="What about something really big? This may surpass your window dimensions. Imagine you're on that boring class with that boring teacher and you didn't slept so well last night. Suddenly you're sleeping in class. Can you believe it?!">I'm a xlarge tooltip</span>
Fit
<span class="a-tooltip a-tooltip--top a-tooltip--fit" aria-label="What about something really big? This may surpass your window dimensions. Imagine you're on that boring class with that boring teacher and you didn't slept so well last night. Suddenly you're sleeping in class. Can you believe it?!">This tooltip's width will fit the element</span>
To Top
Last Updated: January 31, 2018
The "Back to top" link allows users to smoothly scroll back to the top of the page. It's a little detail which enhances navigation experience on website with long pages.
Typography
Last Updated: August 23, 2018
Use
All inline tags (<strong>, <em>, etc.) can be used in conjuction with each other when appropriate.
A typographic utility class in a <span> block should never be used in place of the associated html tag.
<p>: Use for actual paragraph text.- Do enclose every paragraph of text in its own
<p></p>tags - Don't use
to break up paragraphs, unless specifically instructed for certain Pattern Library elements - Don't use for layout blocks (use
<div>for layout elements unrelated to text)
- Do enclose every paragraph of text in its own
<strong>: Use to bold text.- Don't use when a header (
<h1>-<h6>) tag is needed to semantically organize content - Don't use the deprecated
<b>tag
- Don't use when a header (
<em>: Use to italicize text.- Don't use the deprecated
<i>tag
- Don't use the deprecated
<sup>: Used for superscripts.- Do use for footnotes (usually in conjunction with an
<a>tag) - Don't use to simply make text smaller (use
<small>for that)
- Do use for footnotes (usually in conjunction with an
Code Examples
Here is an example paragraph containing most of the basic typographic tags.
Pellentesque habitant morbi tristique senectus et netus et malesuada fames ac turpis egestas2. Vestibulum tortor quam, feugiat vitae abbr, ultricies eget, tempor sit amet, ante. Donec eu libero sit amet quam egestas semper. Aenean ultricies mi vitae est. Mauris placerat eleifend leo. Quisque sit amet est et sapien ullamcorper pharetra. Vestibulum erat wisi, condimentum sed, commodo vitae, ornare sit amet, wisi. Aenean fermentum, elit eget tincidunt condimentum, eros ipsum rutrum orci, sagittis tempus lacus enim ac dui. Donec non enim in turpis pulvinar facilisis. Ut felis.
<p><strong>Pellentesque habitant morbi tristique</strong> senectus et netus et malesuada fames ac turpis egestas<sup>2</sup>. Vestibulum tortor quam, feugiat vitae <abbr title="Abbreviation">abbr</abbr>, ultricies eget, tempor sit amet, ante. Donec eu libero sit amet quam egestas semper. <em>Aenean ultricies mi vitae est.</em> Mauris placerat eleifend leo. Quisque sit amet est et sapien ullamcorper pharetra. Vestibulum erat wisi, condimentum sed, <code>commodo vitae</code>, ornare sit amet, wisi. Aenean fermentum, elit eget tincidunt condimentum, eros ipsum rutrum orci, <mark>sagittis tempus</mark> lacus enim ac dui. <a href="#">Donec non enim</a> in turpis pulvinar facilisis. <small>Ut felis.</small></p>